Showing posts with label Step-by-Step. Show all posts

Wednesday, September 29, 2010

Step-by-Step Painting: Captain Tycho!


Hey there everyone,

This time around we're hitting another step by step painting tutorial following my latest attempt to increase my abilities. I painted Captain Tycho for a friend of mine, as a way of trying my hand at Non Metallic Metals for the first time. I used Games Workshop's article on painting the Sanguinor, and modified it for my purposes.

While the crazed Captain didn't turn out as well as the amazing Eavy Metal effort, I'm very pleased with how he turned out for my first shot at NMM. For those that have never tried it before, Non-Metallic Metals is a painting technique that uses multiple blends of flat based colours to give the false impression of a metallic sheen. It's a VERY difficult technique (As evidenced by the fact that I had to restart 3x while painting Tycho), and is practically a Golden Demon requirement.

So let's get started! I'll be detailing with pictures the work to get him done in NMM, with tips for if you choose not to follow that technique and use metallic paints instead. Obviously we start with a primed mini, and then we launch straight into the job! Note, I've kept the backpack separate from the main mini, to help with getting to the rest of the model; don't forget to paint the backpack gold as well!

Step 1: Basecoat the model with Dark Flesh on any section that you want to come out gold. (In my case, the backpack, armour, and face mask). Through this tutorial you might see Tycho's Right shoulder pad slowly painted gold; don't do this. I kicked myself after getting a great look on it and it turned out I had to paint it red.


Step 2: Next, you want to apply a 1:1 mix of Calthan Brown and Snakebite Leather to the armor, ensuring that you allow the Dark Flesh to show through in the cracks; wherever there is a raised area, on the lowered section immediately next to it, you want to leave the flesh tone.


Step 3: Next you want to take pure Snakebite Leather and add a drop of bleached bone to it. You want to apply it wherever the light would be brightest on the model, depending on the location of the light source. For my first try, I set a lamp directly over Tycho's head, and wherever it looked brightest, applied a thin coat.


Step 4: This is simply a repeat of the last step, multiple times. Add a drop, mix it, and then re-apply towards the brightest light source. Depending on how smooth a transition you want to get, you will re-do this several times until it's nearly a 1:1 mix. Every time you add that drop of paint, too, make sure you highlight with thinner lines, allowing your previous efforts to show through. My example here is after roughly 4 more coats.
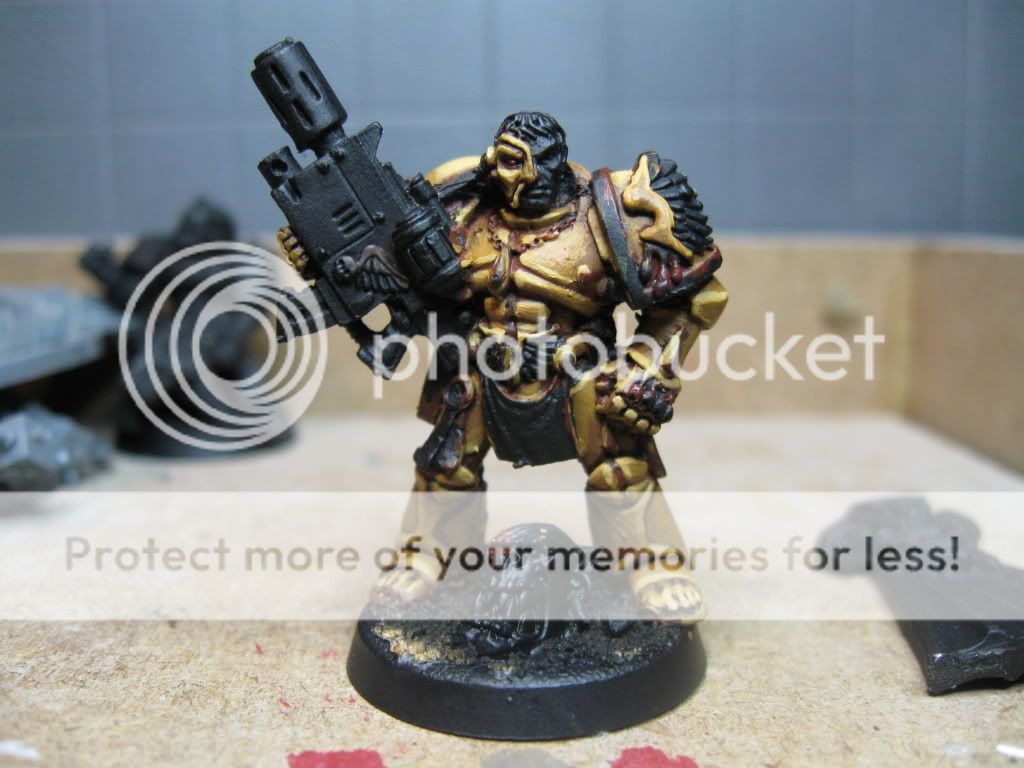


Step 5: (Well not really 5, but for sake of argument)Next you want to water down some Dark Flesh and wash the entire model. No, what are you saying Dragon Knight?! It looks terrible! That's fine, it's to draw back on those highlights a bit and blend it together more.
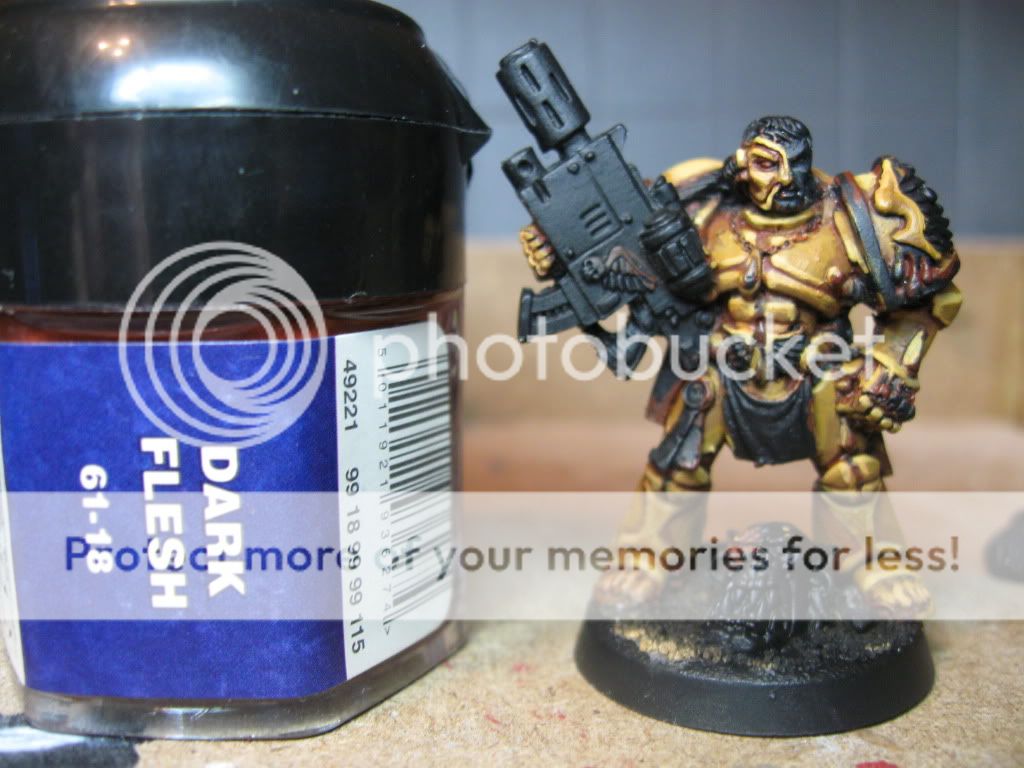


Step 6: Now we want to mix a 1:1 mix of Chaos Black and Dark Flesh... and wash it again! Now the model looks even worse, but if it was a light enough wash, it'll do what we need it to.


Step 7: Okay, okay, back to making this look good. Remember where you were applying those Snakebite/Bone highlights? Take some thinned down bleached bone and apply a THIN line of it wherever those highlights were made. I overdid it a little and had to go back, but you get the idea.


Step 8: Now take some Skull White, and apply a dot of it to the highest, brightest points on the model. In addition, you want to apply some thinned down white in a reflection line to the plates on his upper chest, to give the illusion of reflection.
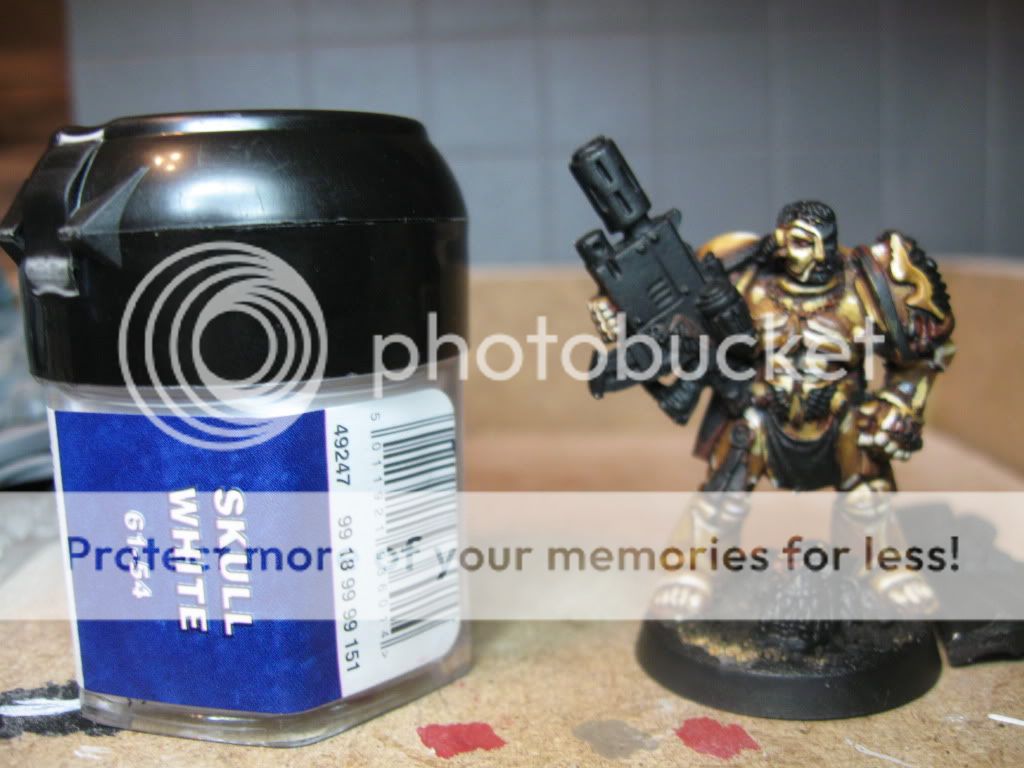


Step 9: Our next step is to make this actually look like gold, instead of well highlighted brown. Take heavily watered down Sunburst Yellow, and apply it on the entire model; there's not much point in it hitting the darker sections, but when it hits the whiter areas, you can see how it's starting to work for us.
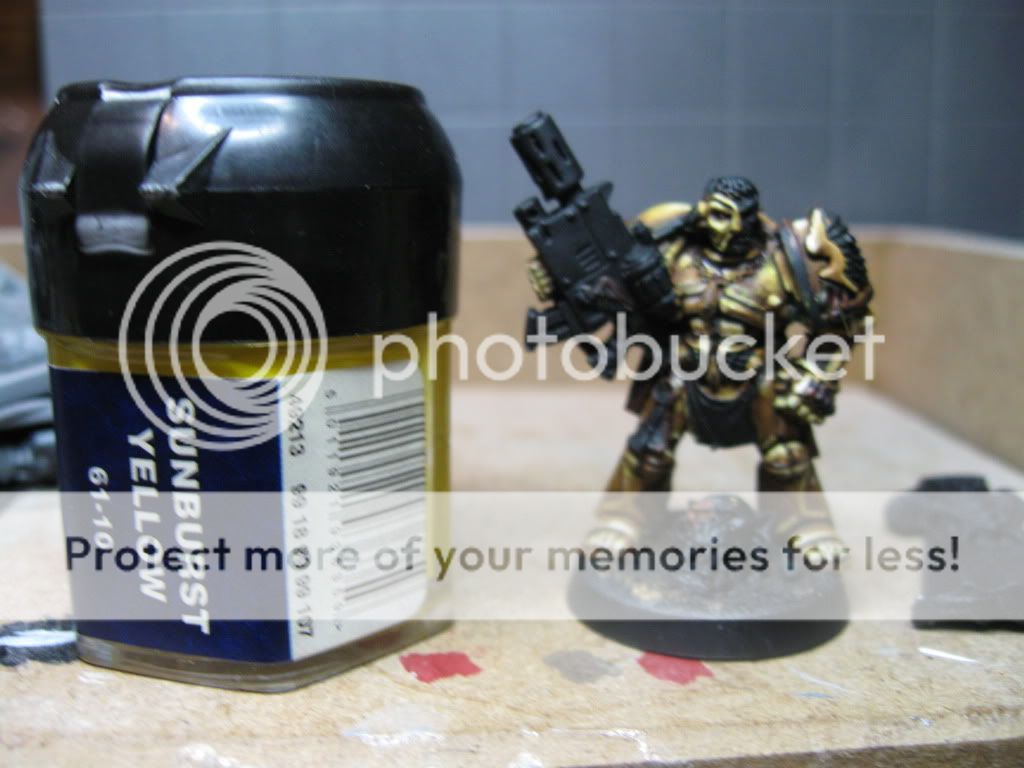


Step 10: Repeat Step 8, only even more sparingly with the skull white. If you've got source pictures of NMM, they can help you with this step. ALTERNATIVE: If you're skipping here from step 1, just apply Shining Gold Paint wherever there's Armor, wash it with Brown Ink, and mix a 1:1 Shining Gold/Mithril Silver highlight that you can apply to the upper edges of the armor. It takes a fraction of the time!


Step 11: Okay! All that to get the armor! As a break, we'll do some easier stuff to get all that detail out of your mind. Take some Deneb Stone and apply a thin coat to his tabard and the parchment of the purity seals.
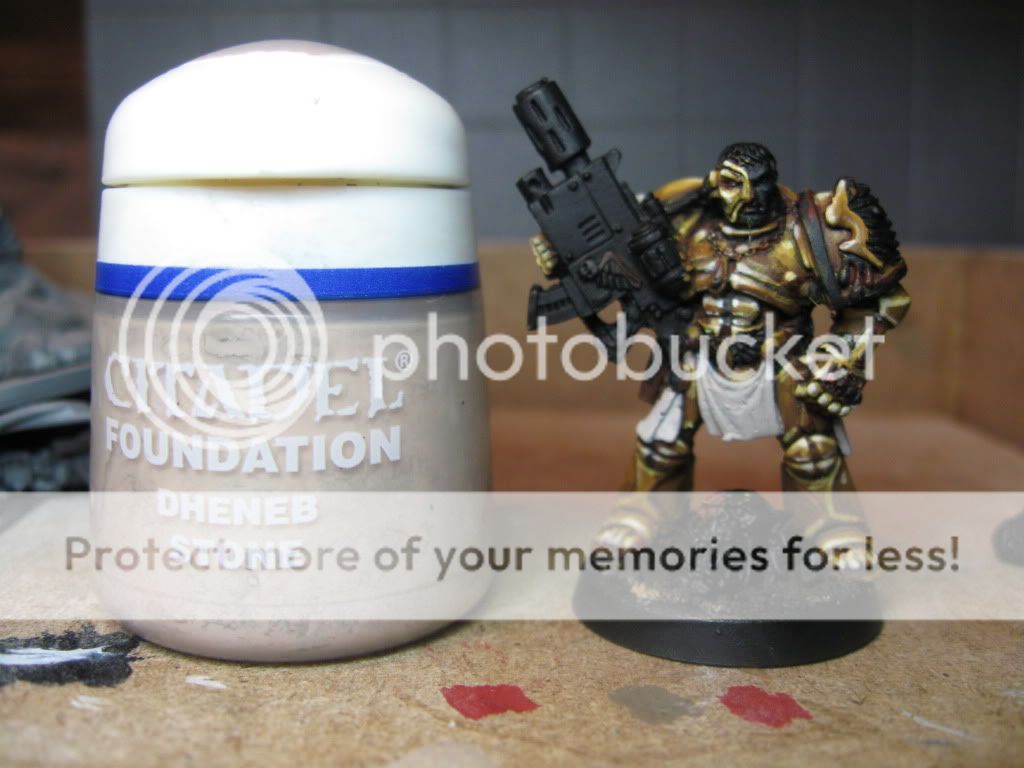


Step 12: Next you want to wash each of those sections that you just painted with Griphonne Sepia. Watch that you don't get it on the armor in a light section; in the dark ones you'll be ok.


Step 13: Next take Astronomicon Grey and apply it to the metal wings on the belt and shoulder. The hair is optional; some people choose to make it blonde, but I decided I wanted to go for the look of a grizzled veteran.


Step 14: A quick splash of Tallarn Flesh to the face for a quick basecoat comes next.


Step 15: Wash that Astronomicon Grey with Badab Black! Regular readers will recognize what we're doing from my Dragon Knight Terminator tutorial.
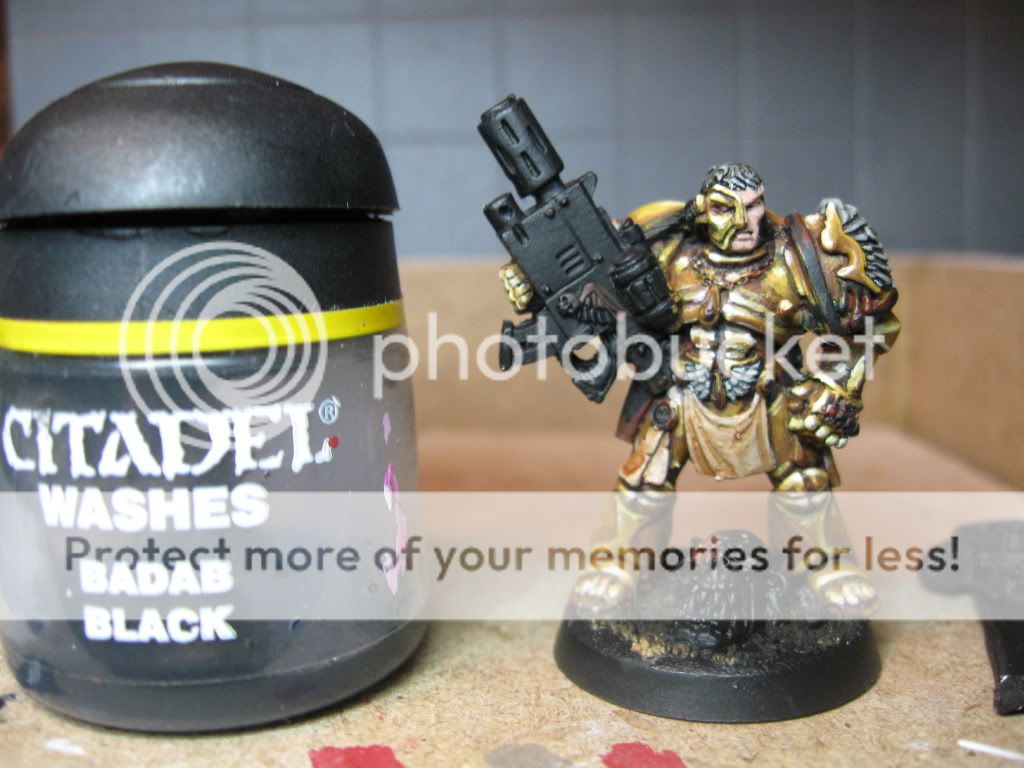


Step 16: Next, we want to bring some definition to the tabard; Kommando Khaki will set it apart from the parchment on those scrolls, making sure that the Sepia wash still shows through in the recesses.


Step 17: Wash his face with Ogryn Flesh, being careful not to get it in his hair (too much!)


Step 18: There are a few Leather items, pouches and the holster; basecoat them straight Calthan Brown.
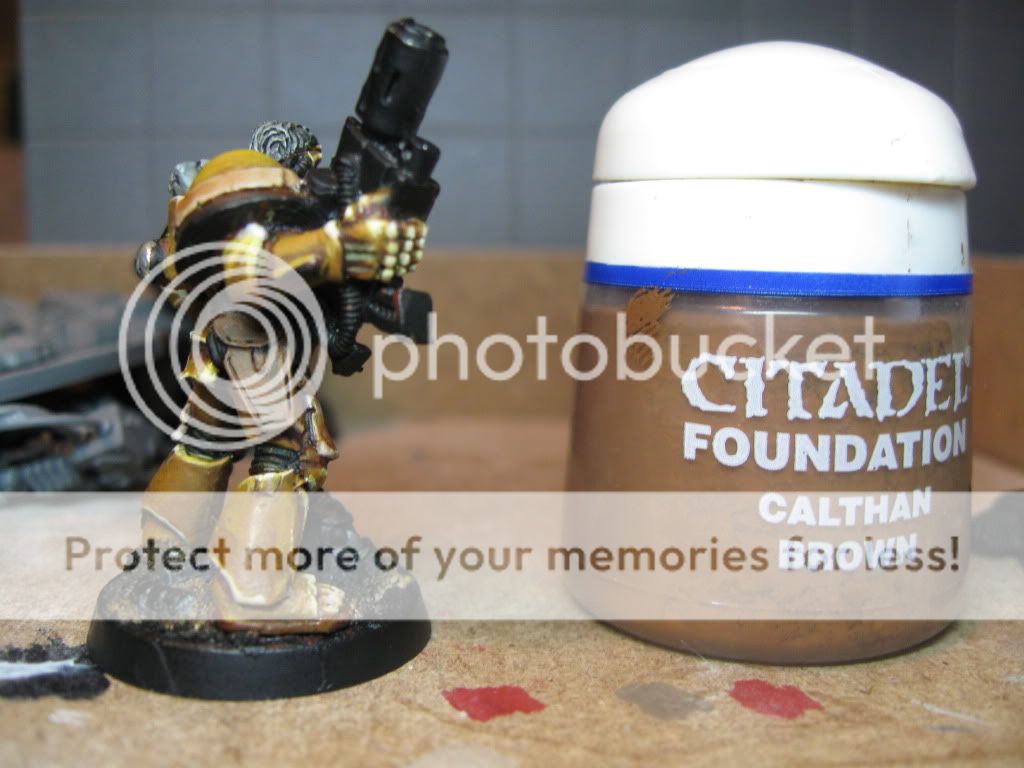


Step 19: Wash those leather sections with Devlan Mud, again careful to not get it on the armor.


Step 20: Jumping back up to the face, we're going to put another coat of Tallarn Flesh in place, letting the wash in the recesses show through some more; Tycho has a heavily lined face, so we're going to get a great look when done.
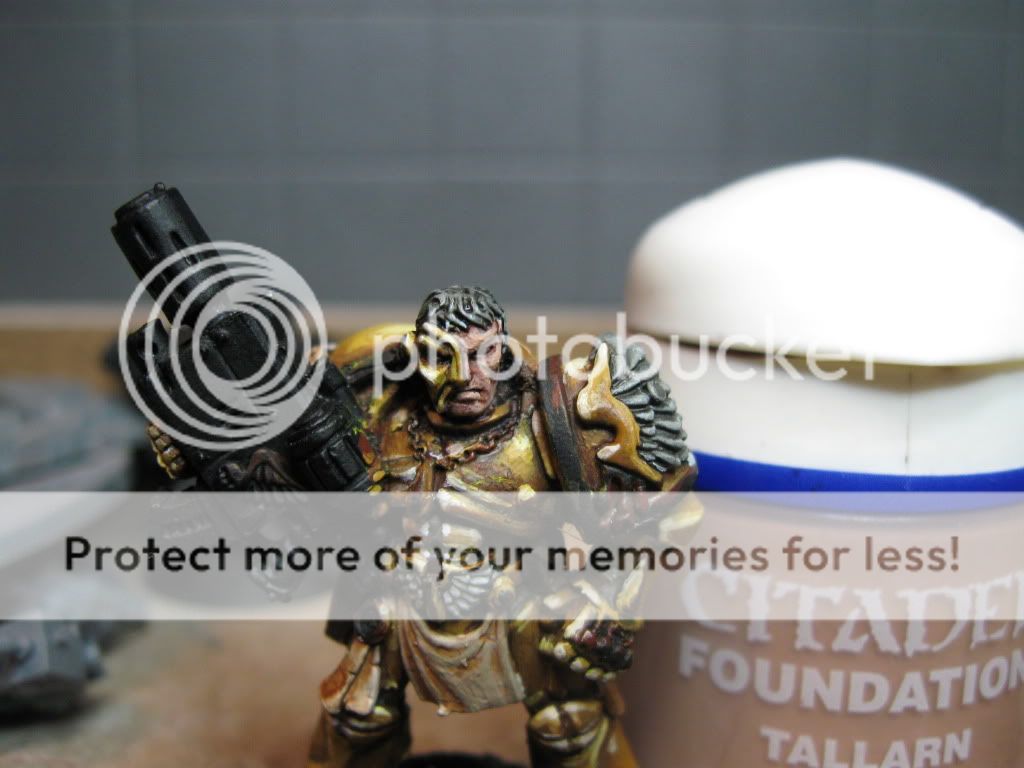


Step 21: Bam! We just jumped about another 5 steps, but that's because we're going to finish Tycho's face completely and I'll be doing a face tutorial later. So, in short, you want to add some skull white and apply it to the portions of his face that would show the light the best, just like the armor. The difference here is that you're going to mix a LITTLE chaos black into it each time, to give his face a slightly haggard look. Mine took another 4 coats. From there, direct Skull White on the eye and a black dot for the pupil, and it's done!


Step 22: Next you're going to mix a 1:1 Fortress Grey / Skull White mix and finish off his hair, making sure to allow the darker grey from underneath shows through on some strands. This is a chance to clean up any oops' that occured when finishing his chiseled mug.
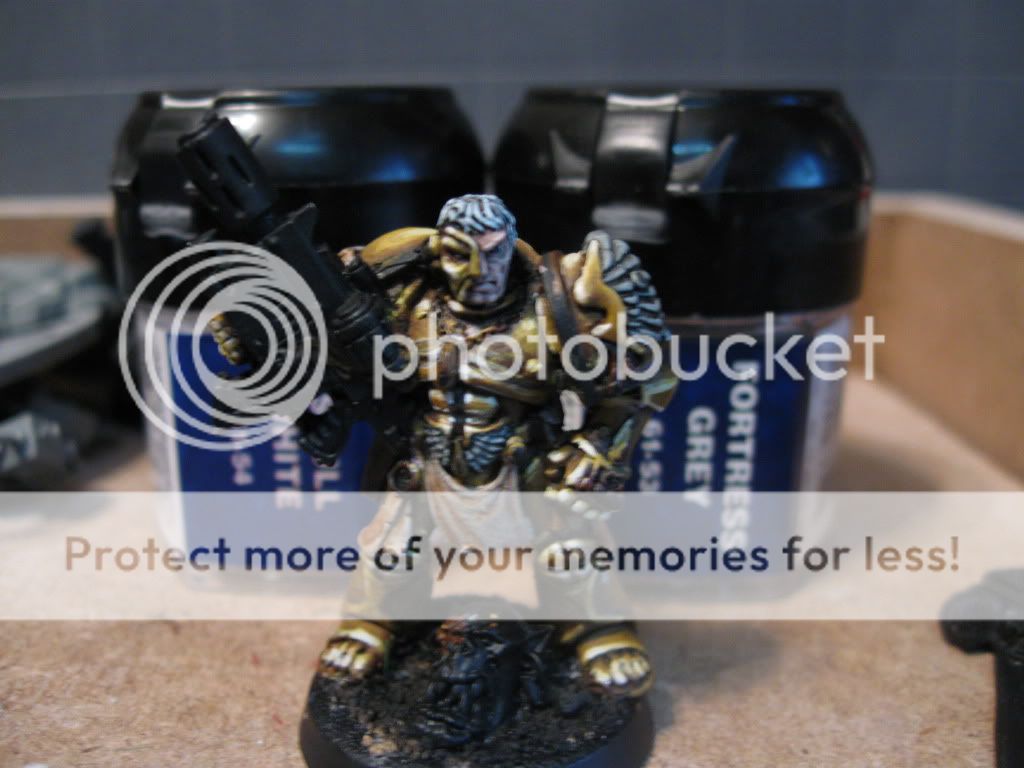


Step 23: Now with some pure Skull White, you want to hit just the tips of Tycho's hair, highlight the edges of the purity seals, and put a coat of white on the wings on the armor (May take two depending on coverage). Again, as always, make sure the dark grey in the recesses still shows through.


Step 24: Ok folks, unfortunately the wait is over; after knocking your brains out over the gold armor, I've given you as much of a break as I can. Now it's time to start the Non Metallic Metal on the gun. Hit it with Codex Grey wherever you want it to be metal. (Alternately, skim the next few steps, but apply Boltgun Metal to the same locations, wash with black, and highlight with Chainmail.)
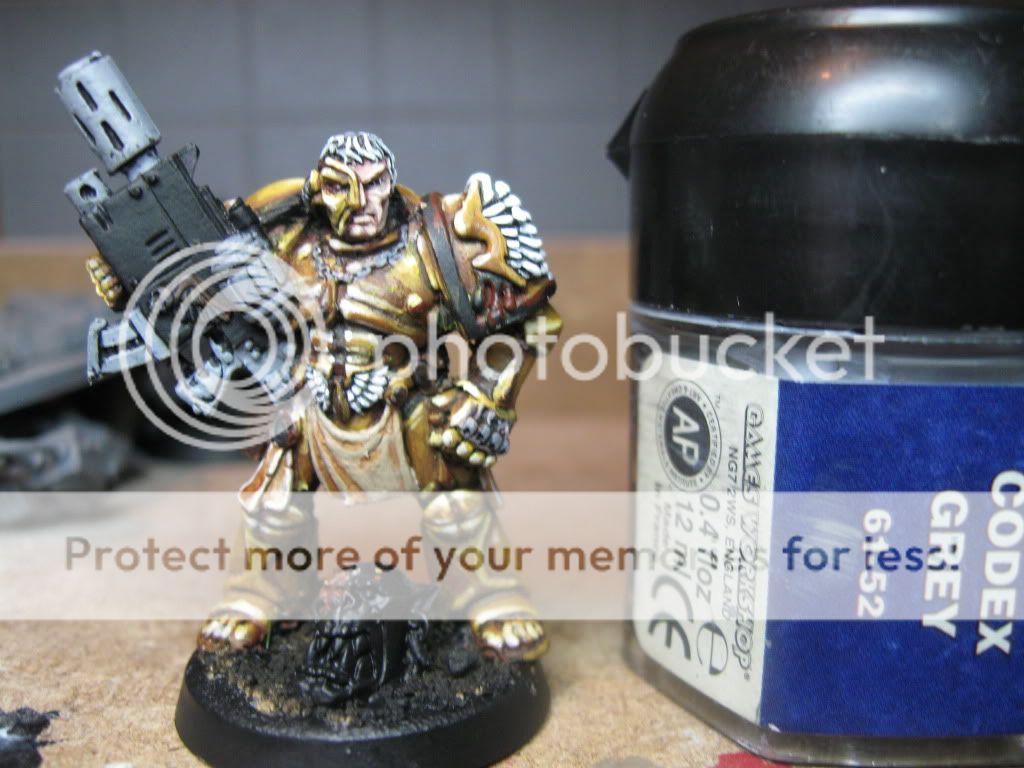


Step 25: Next, you want to start applying Skull White to the Codex Grey; draw an invisible line where that lightsource is coming from, and start lightening it towards the top of the metal surfaces until you're nearly to pure white. I did it in 5 steps; this is slightly different from the armor, since we were going for an actually shiny look there; here we want more a dull colour.


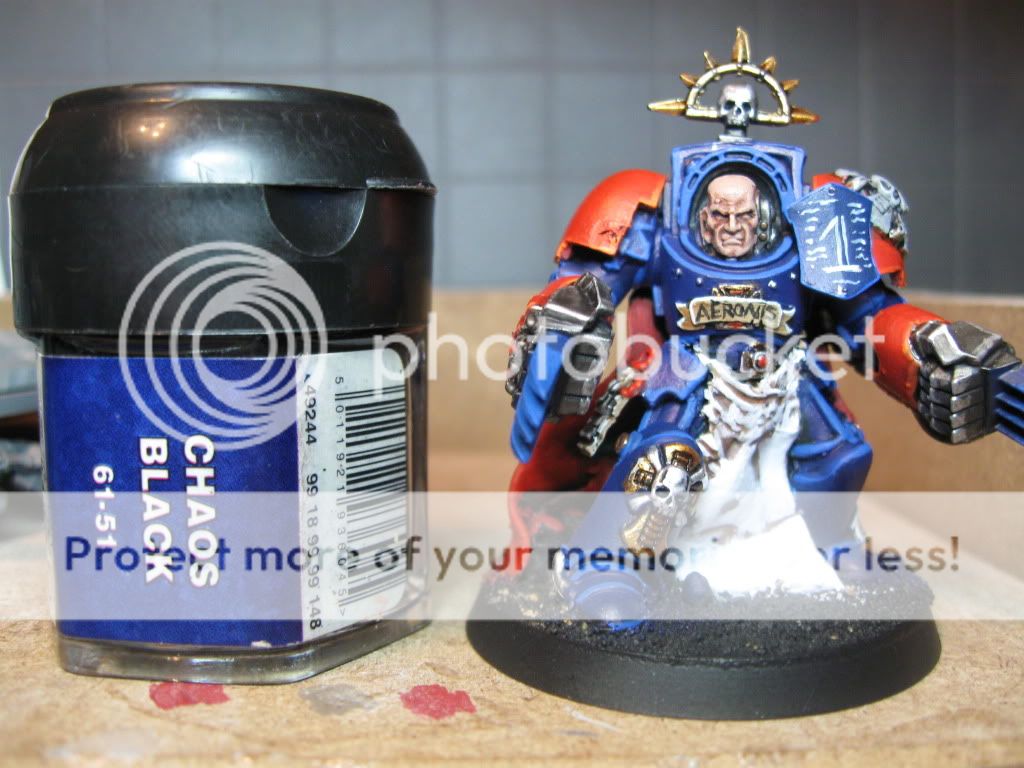
Step 26: Now from that invisible line, you want to go down, applying Chaos Black to the grey until it's nearly the colour of Adeptus Battlegrey. This marks the end of the NMM that you have to do on Tycho; we'll cheat a little when it comes time to do the studs ;)


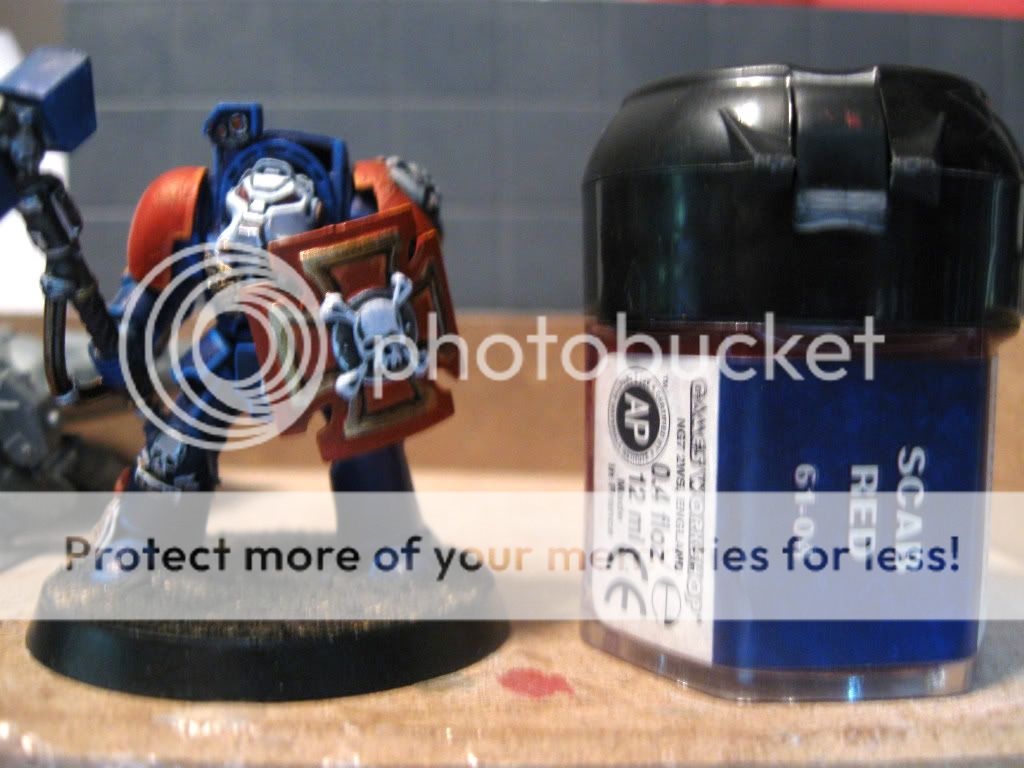
Step 27: Now from here we do the rear shoulder pad, blood drops and the gun; Mix a 1:1 of Mechrite Red and Scab Red, and apply it straight onto the surfaces. Right about now you can feel my pain at having to paint that shoulder pad!


Step 28: Next mix 1:1 Scab Red and Chaos Black, water it down a bit and apply it sparingly to the outer edges of the shoulder pad, and the recesses on the Combi Bolter.
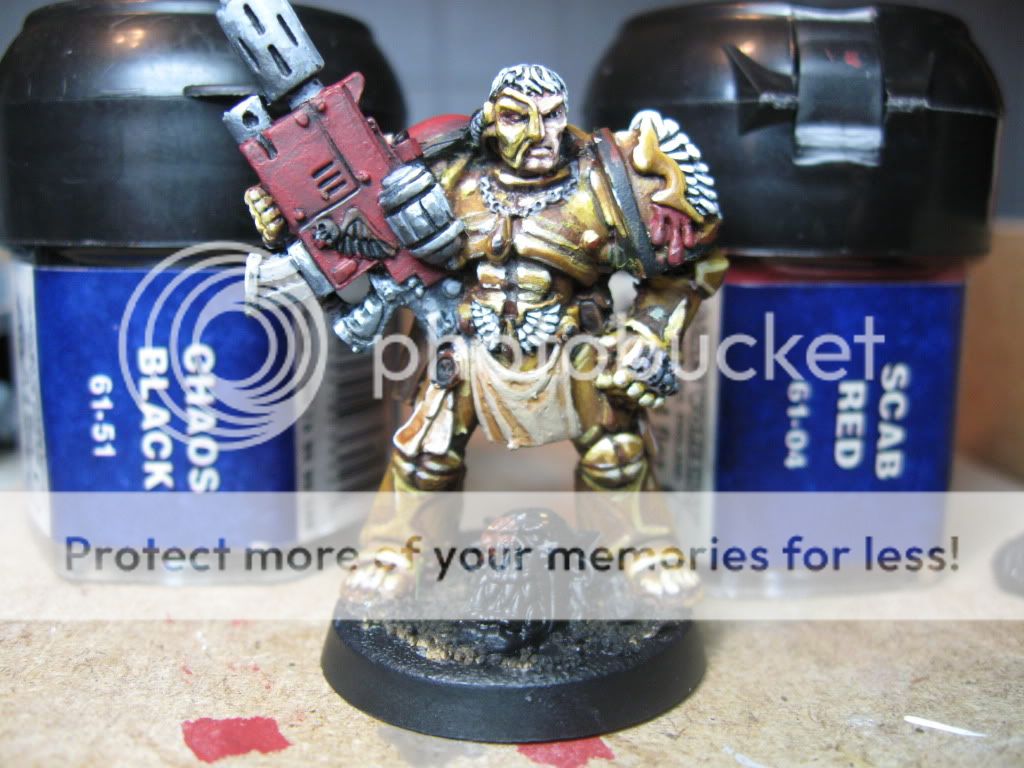


Step 29: Mix a 1:1 of Mechrite Red and Blood Red, and now you want to lightly apply it to those upper areas on the gun casing, and the central section of the shoulder pad, as well as all over the blood drops. You can drybrush the shoulderpad here, but don't do it for the gun.


Step 30: Now mix 1:1 Blood Red and Fiery Orange, and highlight the upper edges of the gun and drops. Also, you can apply a VERY light drybrush to the top of the shoulder pad here.


Step 31: Take Skull White again and apply a couple dots to the uppermost portion of the shoulderpad, and the TOP edges of that combi bolter and blood drops. Be very sparing here; this is to just give a slightly sparkling effect.


Step 32: Ok, enough highlighting and shading for a moment; take Chaos Black straight out of the pot, and paint the trim on the Shoulder pads. I've also taken the opportunity to do my detailing on the tabard and add black scrawling script on his purity seals.


Step 33: Next we're going to quickly paint the wax on those purity seals. Base them with Scab Red, and then hit the raised edges of them with Blood Red. There are dozens of colours you could put on them; some people even paint them purple, so do what seems most comfortable to you. If you're doing the red though, this is also the perfect time to paint the eye inside the halfmask on Tycho's face.


Step 34: Apologies for the blurry picture, my camera acts up from time to time. However, you can see that you need to apply some Graveyard Earth to the edges of all the leather pouches on the model.


Step 35: Next, you want to use hard edging to highlight the extreme edges of the shoulder pad trim with Adeptus Battlegrey...


Step 36: ... and follow up on the corners where the light would be brightest with codex grey!
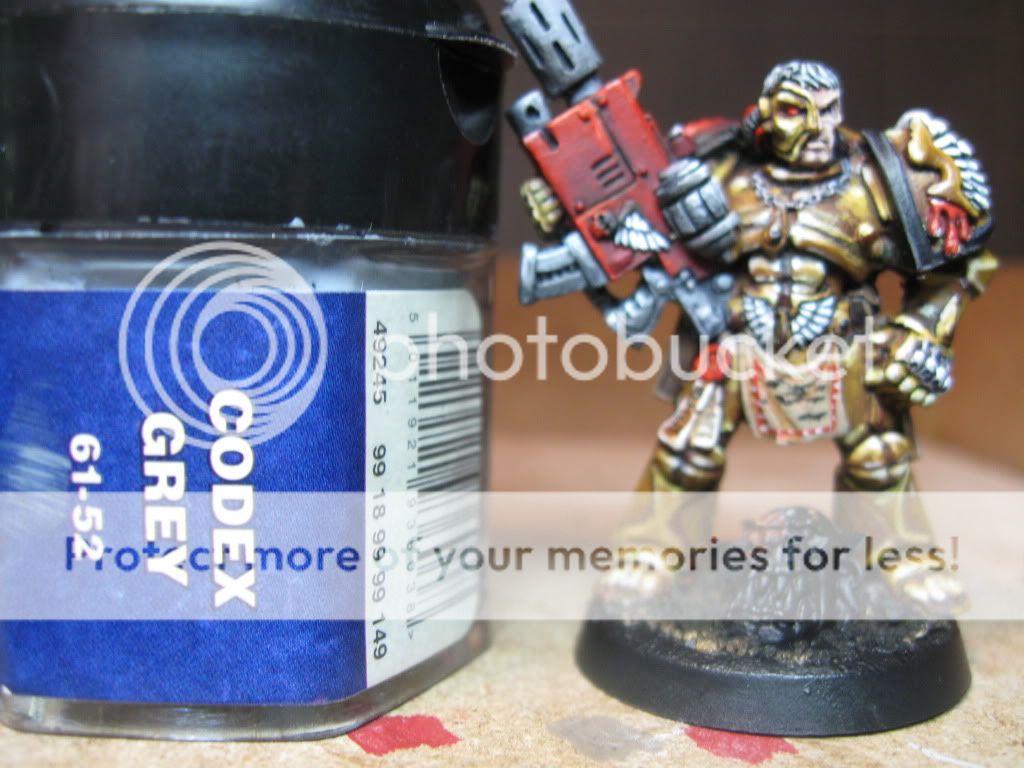


Step 37: And now we cheat! See all those studs and screws? Rather than paint each one painstakingly with NMM and get very little results, just take some Mithrill Silver straight out of the pot and presto!
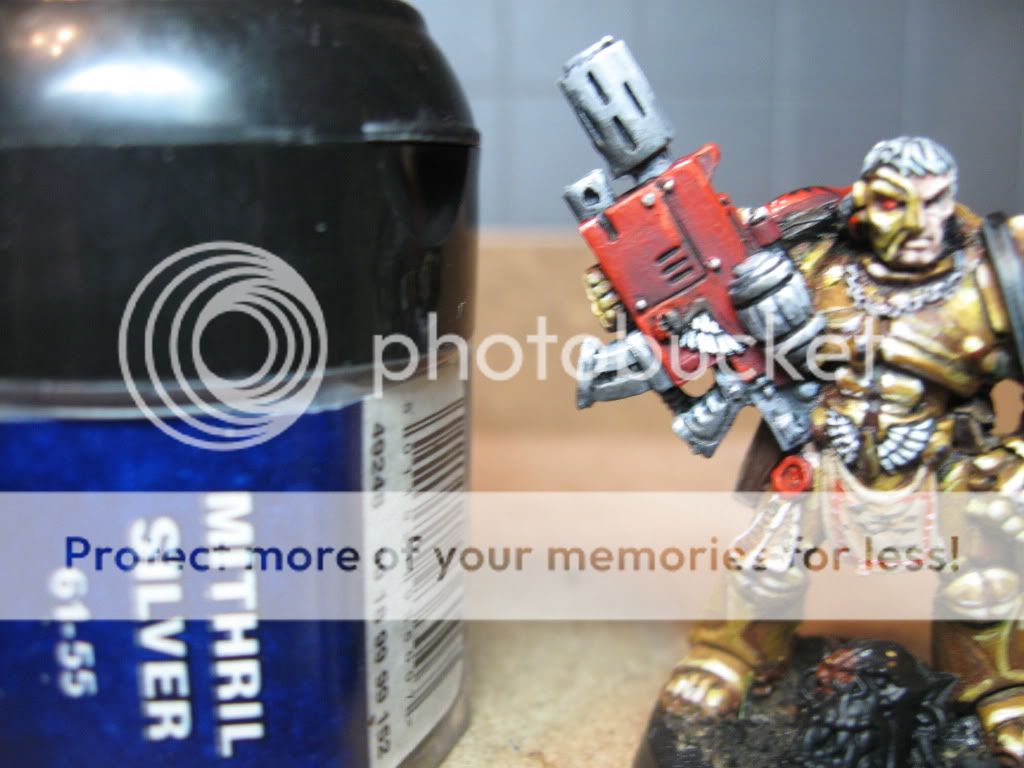


Step 38: Now we're on a cleanup stage; any little details you've missed should be painted now. I used the previous techniques on the winged skull on that combi bolter to get it done, and picked out a few wires with straight blood red.
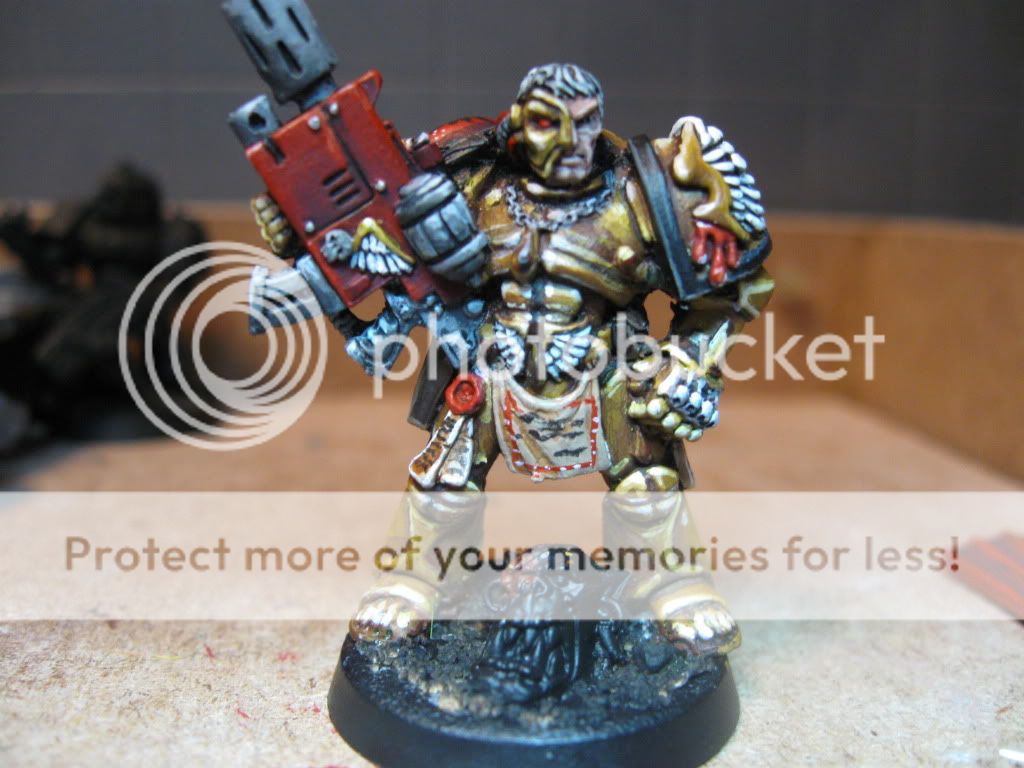


Step 39: Next we want to take some Tin Bitz and drybrush it liberally all over the end of that combi melta (Covering some of that beautiful NMM, oh no!). If you want a Combi-Melta that's never been fired, you can skip this step. Next put some chaos black down the barrel (drybrushing again),
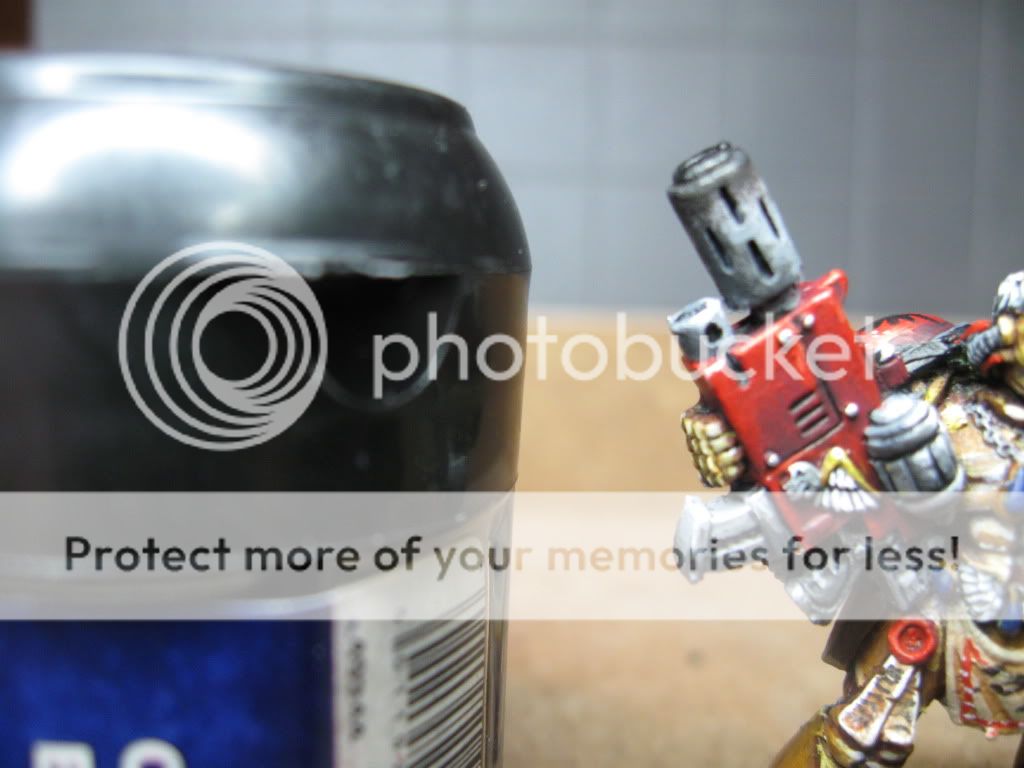


Step 40: Now we come to the gems; I chose to go the same colour as the ones in that white dwarf, but you could paint them whatever colours you choose... the principles stay the same. First, basecoat the gems in your darkest colour (Regal Blue for me).


Step 41: Next add intermediate colours on the side facing away from the light; I used Hawk Turquoise and an even smaller sliver of Ice Blue. Then take some skull white and put a dot of it on the side closest to the light. And Tycho himself is done!


Step 42: Now if you've followed my tutorial through to the letter, you have a great looking Tycho, minus a backpack; it's up to you how you want to handle this. There're the old 3rd edition backpacks that are meant for regular hugger marines from that era, the Sergeant backapacks with banner poles for those who want to do some freehand, or the metal Captain pack with the cape that I chose to use.


Some advice, however; if you use the metal pack, you want to cut the nub off Tycho's back before painting with some clippers. The metal pack won't fit right if you don't, and will look strange when you glue it in place. The principles for painting the pack are the same; gold like the armor (Which I think turned out better than the armor itself), steel for the vent sections, and I used the same technique for the cape that we used on the combi bolter and shoulderpad. I also suggest hand-painting the Blood Angels symbol, if you can, to avoid having to muck around putting a decal where on when that script is on that pad.


Once the backpack is done, all that remains is to base him! I chose a desert scheme, with the severed ork head to represent his hatred of Orks, and the Weirdboy that caused his hideous rictus that made him require that face mask.

Total time to paint was about 30 hours, but I'm really pleased with the result.

I hope everyone found this informative, and if you have thoughts on Non Metallic Metals, or any of the techniques I used, please feel free to share!

Thursday, August 5, 2010

Step-By-Step: How to Paint Dragon Knight Assault Terminators

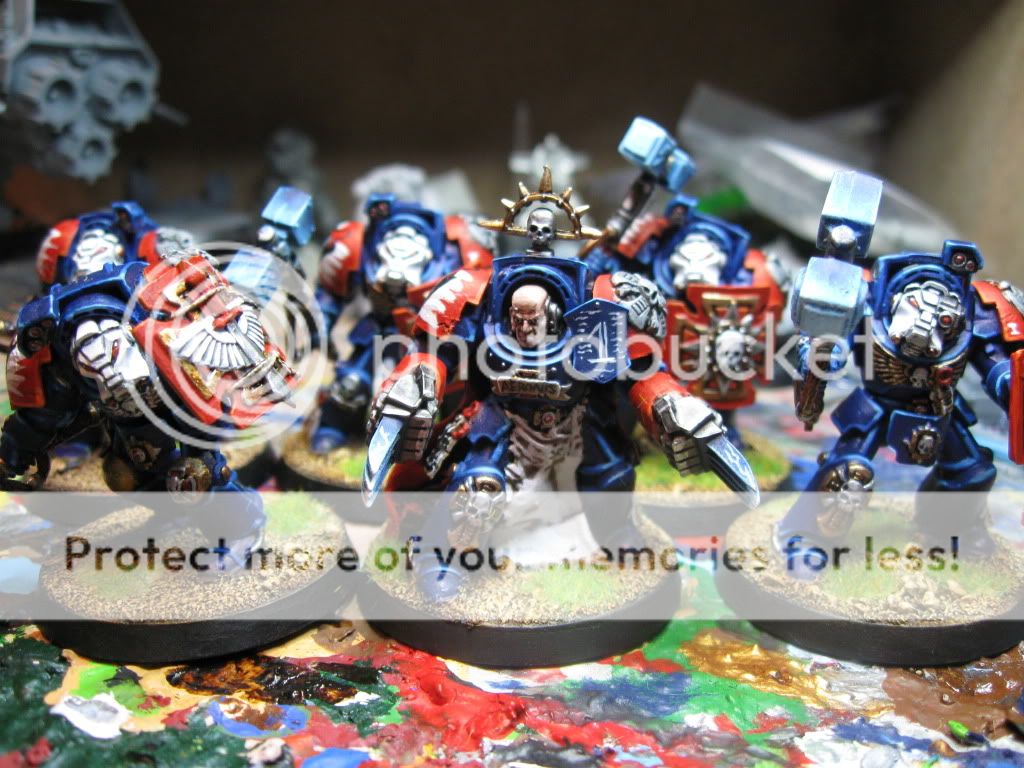
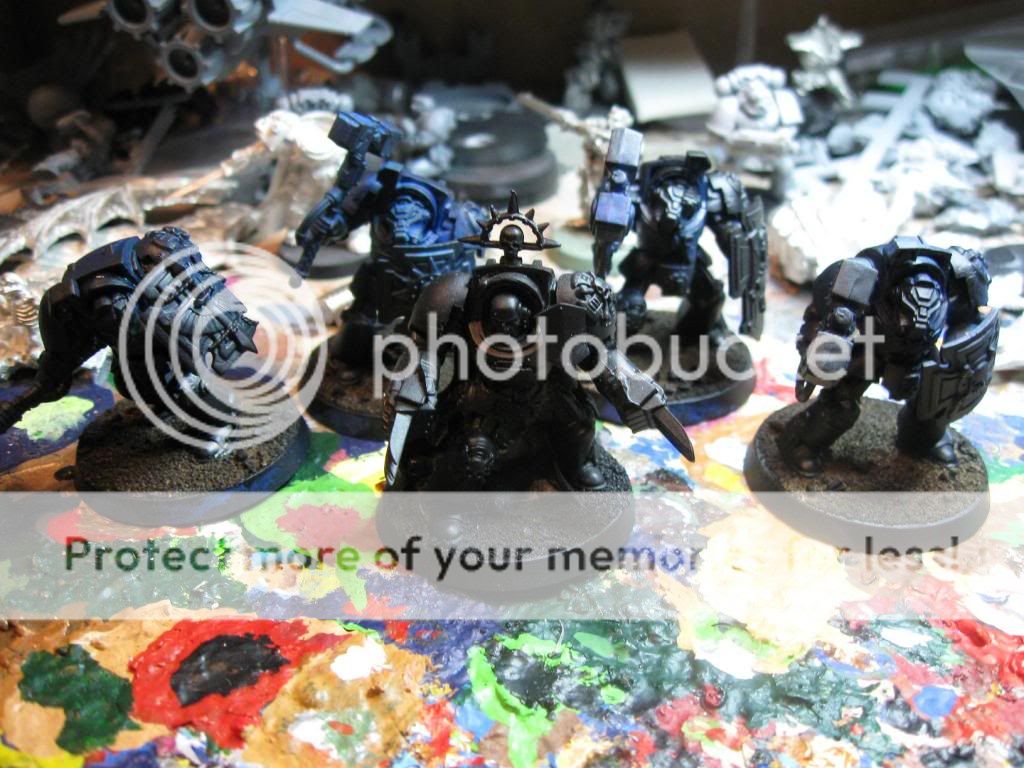
As anyone who's part of the Freebootaz Forum Motivational Challenge knows, I've been pounding away for the past 4 days on a unit of 5 Assault Terminators for a tournament on Saturday. As they're some of the most vividly striking models out there, I decided it'd be fun to do a 'step-by-step how to' on how to paint them up. This will help a) anyone that absolutely loves my DIY colour scheme to reproduce DragonKnights of your own, and b) help you take bits and pieces from the experience to help recreate parts of my paintjob that you like. There are a few things, such as faces, lenses, and the weaponry's energy effects that I won't be going into in the greatest of detail, mainly because I intend to do a tutorial on how to do those specifically in future.


So, without further ado, grab your brushes and paints, and let's go! Also, if you don't have a particular colour that I use, don't worry about it; I use exclusively Games Workshop paints, and they aren't that hard to mix to a different colour. Also, you'll note that the primered photos show a slight blue tinge to some of these guys. I had a bit of a disaster with the Army Painter blue spray in which almost all the detail was lost on the models. After a dunk in the bacta tank of Simple Green at home, however, we're right back on track!


Step 1: So to start off, we've got our primary basecoat. I mix roughly a 2:1 mix of regal blue to Midnight Blue. An acceptable substitute for Midnight (Since GW doesn't make it anymore!) is Necron Abyss. We just want to darken the Regal Blue a little to generate an undercoat; overload with Midnight blue or Necron Abyss, and it gives the armor a weird sheen.


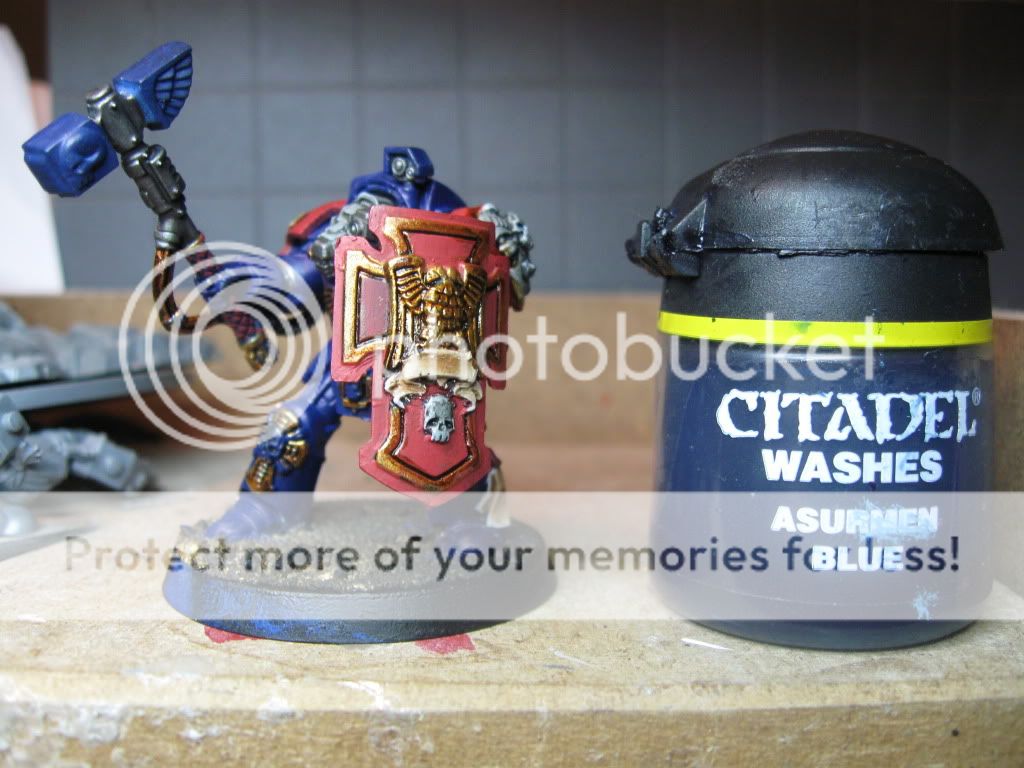
Step 2: Next is a light coat of straight Regal Blue. You want to avoid getting it in all the cracks and crevices; this step is closer to a drybrush than actual painting. All you want to do is bring the prominent armor locations up to Regal Blue, leaving the darker colours underneath. If we were working with a lighter blue, I'd suggest an Asurmen Blue wash, but it doesn't show up very well here. Also, now is a good time to apply a coat of straight Regal Blue to the head of the Thunder Hammer.


Step 3: Mechrite Red now goes on the shoulder pads, shield, and the handle of the Thunder Hammer. This is our basecoat for those vibrant reds in a few more steps. I suggest leaving the purity seals and lenses alone for now, as we can use a better base than Mechrite.


Step 4: Astronomicon Grey is now used for the basecoat for everything we want a vibrant white (Helmet, Wings, Skulls on the shields), and the Crux Terminatus on the shoulder. Normally I base with Deneb Stone, and this is a perfectly acceptable alternative, but I find that the Grey allows for a far more striking contrast later. You do whatever you're more comfortable with!


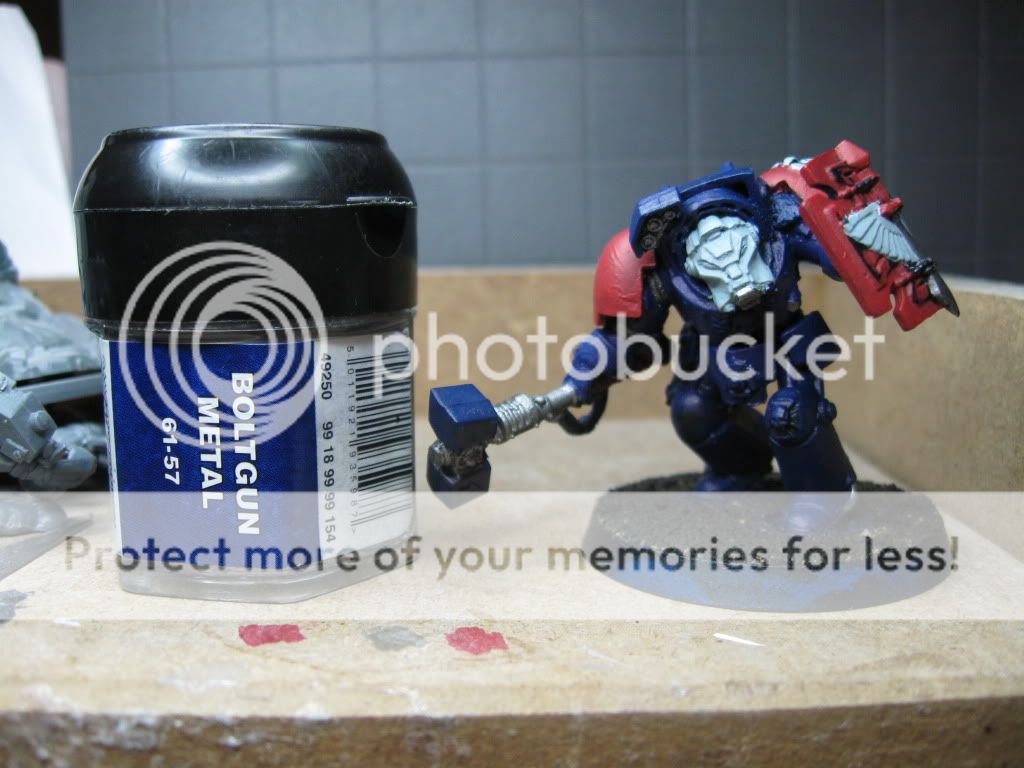
Step 5: Boltgun Metal. This is my least favourite part, but it has to be done! The joints of the legs and arms, the vents on the back of the armor, the shaft of the hammer and the vents on the helmet need to be done. In addition, as each Terminator is unique on some level, there will be sensors and parts of the shield (In this case the dagger tied to the front) that you will want Boltgunned.


Step 6: The Shining Gold shoulder pad trim that distinguishes Dragon Knights from Crimson Fists, plus the kneepads as well, are absent for the most part here. Some of the Terminators will have kneecaps that need a coat straight onto the model (Which may be slightly poor to cover, so you may need two coats), and each Storm Shield has a Templar's style cross engraved on the front that can use a coat of it. Honour badges and the rings marking the edges of the hammer's grip also need a splash of paint.


Step 7: It's a bit dark to tell (And a poor model choice), but here's where the Deneb Stone comes in. This is the main colour for the purity seals attached to your Terminators (sometimes there can be 2-3 of them!). I also used it on the laurel on this Terminator's chest for a change, but some people will even colour them green. Don't feel my way is the only way!


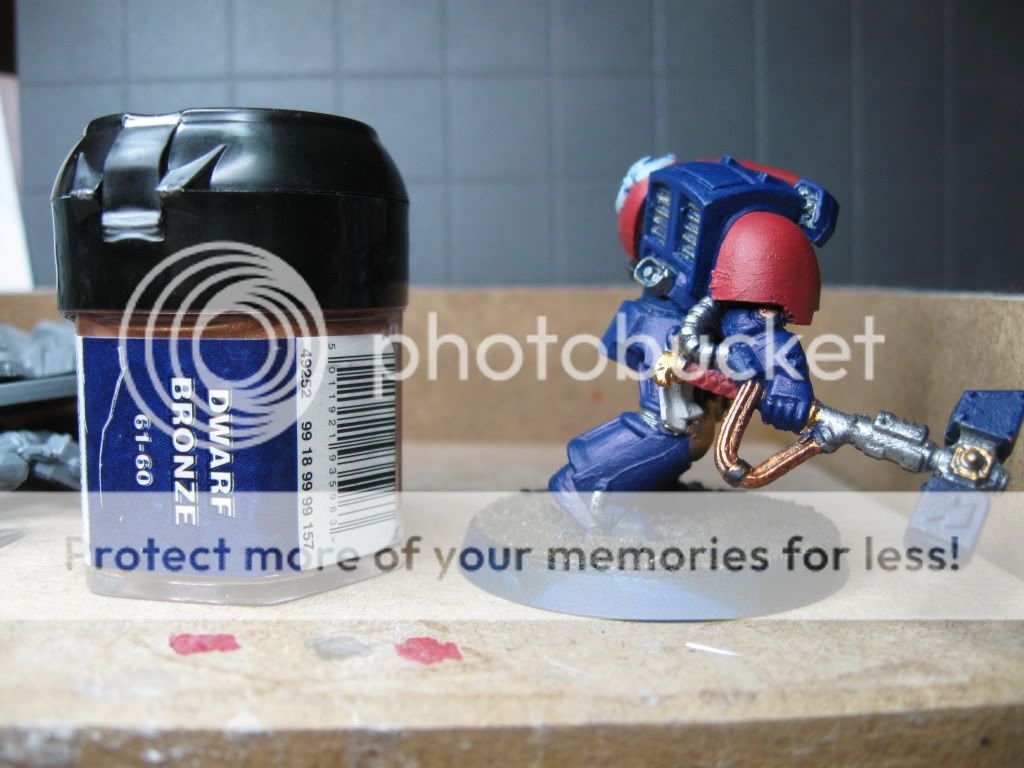
Step 8: n the absence of Brazen Brass (Another dead colour from GW's past), I'm using Dwarf Bronze on the cables to the Thunder Hammer and the round joints on the Terminator armor. In addition, the two prongs on the end of the helmet look great done up this way, as we'll make them look dark copper by the time we're done.


Step 9: Now for a final touch, apply some Scab Red to the wax on the purity seals. This marks the end of the 'basecoating' stage; while there are a couple '1 shot' items of paint now, the bases are done now. If want, skip ahead to the Mithril Silver section, and you can put these on the table and count them as fully painted in 10 steps! However, if you want to go further,keep going with the next step. Washes!


Step 10: Now we get to a slightly less time consuming portion of the tutorial; if you work quickly, you can get 3-4 washes on a single model, and then let it sit for 15 minutes until it's all dry, rather than applying a wash, waiting for it to dry, applying another wash, etc. So to start off, apply a Badab Black wash to all the points of the model you painted Boltgun Metal, AND Astronomicon Grey. The Grey will look incredibly dark, but never fear, it'll come out looking crisp and bright when we're done! I've had it told to me before, and I agree: the new washes are skill in a bottle! Apply a few of these and your mini will look 100% more finished than it did before!


Step 11: If you have Brown Ink, you're golden, otherwise you might want to try Devlan Mud, though the Mud generally doesn't work quite as well since it has a dull sheen. You want to apply the Brown Ink CAREFULLY to the interior edges of the cross on the shield, to darken the red in there and give the gold a stronger contrast. Then you want to apply the ink in a 2:1 Water to ink wash to the gold on the model, being careful not to let the shiny ink slop. Also, you want to put a 1:1 mix of the ink and water on all the dwarf bronze areas (Cables and joints). Lastly, use the 2:1 mix (Sparingly, let a paper towel absorb some of it first), to outline the Crux Terminatus that you washed black, on the red, to draw a dark circle around it.


Step 12: Apply a Griphonne Sepia wash to all Deneb Stone (Which should be, for the most part, just the purity seals. I also applied it to the greenstuff tabard of my Sarge.)


Step 13: Apply Asurmen Blue to the red grip of the Thunder Hammer. This is going for a red leather look; if you want to experiment, try a Leviathan Purple or Thraka Green wash for nice results! One note of caution though; Baal Red doesn't wash well with Mechrite AT ALL, mainly because the Baal Red wash has a lighter pigment.


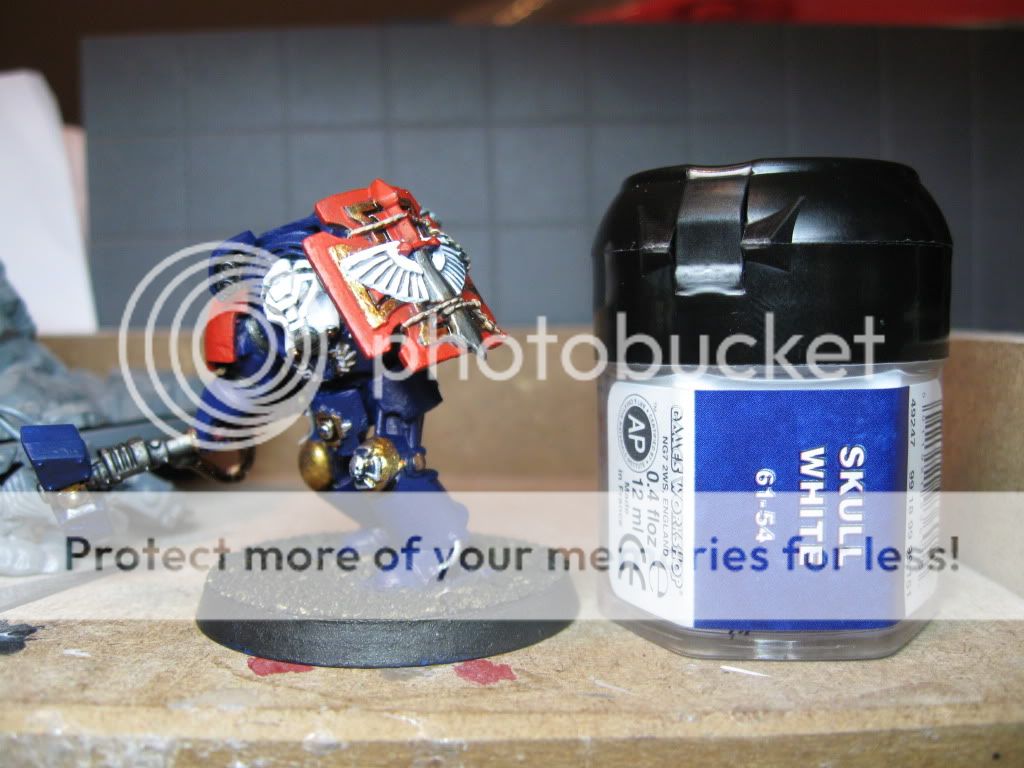
Step 14: Working with white has always bothered me; it usually used to come out looking very blotchy and you can see the undercoat beneath the white. However I tested this method on the Terminators, and it turned out nicely! Mix your Skull White 2:1 Paint:Water, and then highlight the helmet as though it was a face, letting the grey underneath show through. I'll be posting a more in depth Tutorial on Faces and Helmets later, but for now, highlight the bridge of the 'nose', the edges of the 'cheeks', and the top of the helmet with the 3 bumps, allowing the Grey to show through in the cracks like I've done here. It'll probably take two coats of white mixed 2:1, but once done you'll have a striking helmet! Also use this on anything else you painted Astronomicon Grey, AND the outer edges of the purity seals.


Step 15: Now apply a nice, even coat of Blood Red to the Shoulder Pads, Shield, and raised edges of the wax for the purity seals, letting the scab red show in the center of the wax. Leave the eyes for now; we'll get to them in a bit. Also, you can basecoat your gemstones if you're going to make them red in the long run.


Step 16: Now apply Mithril Silver to the honour badges on the Terminator armor, and highlight the metal that you washed black with it as well, hitting the upper edges of anything that has sharp corners. Don't over-do it though; you just want a hint of light glinting off the venerated metal.


Step 17: This step will take a while, and may have you frustrated by the time you're done! Take Enchanted Blue, straight out of the bottle, and apply it carefully with your fine detail brush to EVERY hard edge on the suit of Terminator Armor that was painted Regal Blue. Right now we're just picking out the edges, so don't worry about directional highlighting just yet, and don't worry too much if you slop onto the rest of the armor; as long as it doesn't mar something on a red or white section, you should be fine. We can clean up any little mistakes later with some more Regal Blue. Also, now is a great time to drybrush Enchanted Blue onto the hammer head, letting the back edge of it stay Regal Blue


Step 18: Enter the Sarge! This next step (after you've been cursing all the blue highlighting), is relatively simple and short; take some Fortress Grey and apply it to the Crux Terminatus, allowing the darker gray in the crevices to show through, instead of filling them.


Step 19: Back to all this highlighting nonsense, this step shouldn't take as long as the enchanted blue did. Apply Blazing Orange to ALL the edges of the shoulder pads, and the shield, interior edges included. Also, any gems that you based blood red can get a highlight of orange now too.


Step 20: Now you want to go back over the areas you just did, and pick out the upper edges and corners of the red areas and cover over them with a thin coat of Fiery Orange. This shouldn't take too long, just a steady hand.


Step 21: With the Chaos Black, we're just going to pick out a couple details. For the purity seals, water down the black to a 2:1 paint/water mix, and hold the brush a little farther back than you normally would. This'll make your hand shake a bit, but it's worth it, as your slightly squiggling brush will now create 'script' on those purity seals that's convincing. In addition, fearless painters may want to write names on engraved parchment like on the Sarge's chest and the shield of one of the Terminators.


Step 22: This step will consume a bit of paint, mainly because Mithril Silver and Shining Gold both dry very quickly, and they look terrible watered down. Anyhow, you want a 1:1 mix of the two paints, and you want to pick out the upper edges of all the gold on the model, wherever light would strike. This is an excellent opportunity to also clean up any small spills you had with the brown ink! Don't highlight the dwarf bronze though; we're done fooling with it.


Step 23: With a fine detail brush, you want to base the eye lenses in Scab Red. I'm going to do the next few steps all at once, since I'm going to do a lense tutorial in the future. If you're not fond of doing them though, Scab Red is a perfectly legitimate colour to leave them. If you want a good tutorial on how to do them though, Look inside "How to Paint Space Marines" for the guide I use.


Steps 24-26: Here we have the finished lenses; after applying the Scab Red, cover half the lense with Blood Red, with the lighter red facing towards the front of the helmet. Next cut that red area in half with Blazing Orange, and finish with a dot of skull white at the apex of the lense, near the back. You know you've found the right spot if it's the point where the lense bumps out the most, and then suddenly retracts into the helmet. This might be easiest if you have a raggedy old fine detail brush down to its last few bristles. Now's also a great time, since you have the white, to clean up any mistakes you made with the red that went out onto the helmet.


Step 27: This is another finicky bit, but not as tricky as the gold. We've got the same idea; Mix a 1:1 mix of Enchanted Blue and Ice Blue, and apply it to only the upper edges of the armor. They don't dry quite as quickly, and you should be able to keep them fairly thin with the occasional drop of water. The tricky bit though, is knowing when to stop; generally I use the rule that if you cut the length of an edge into thirds, this highlight should only take up 1/3rd of the edge. On a square piece of armor, therefore, with two edges pointing skyward, you would have 1/3rd of the mixed highlight, 1/3rd in the center pure enchanted blue, and the remaining 1/3rd the mixed highlight. Play around with it, find what you're comfortable with, and don't forget to drybrush this colour onto the hammer head!


Step 28: What, another blue highlight? I'm going mad! This time apply thinned down ice blue to the upper corners of everything, just like you did with the Fiery Orange. You should only be covering about half of each of those mixed highlights you just did, to give a nice crisp transition. Lastly, that hammer head is really starting to look frosty towards the front... give it another drybrush!


Step 29: Since we've been working at it all the way through this tutorial, we might as well finish the Thunder Hammer, though I'll be re-posting the way I do them at a later date. Now mix a 2:1 Skull White/Ice Blue mix, and drybrush this onto the STRIKING POINT on the hammer... repeat, only where he's going to be hitting people. Now clean off your brush even further, and carefully drybrush back along the edges of the hammer to the back of it; if you worked up the colours in stages, it'll look like this blue force is working its way to the head of the hammer to erupt on contact!


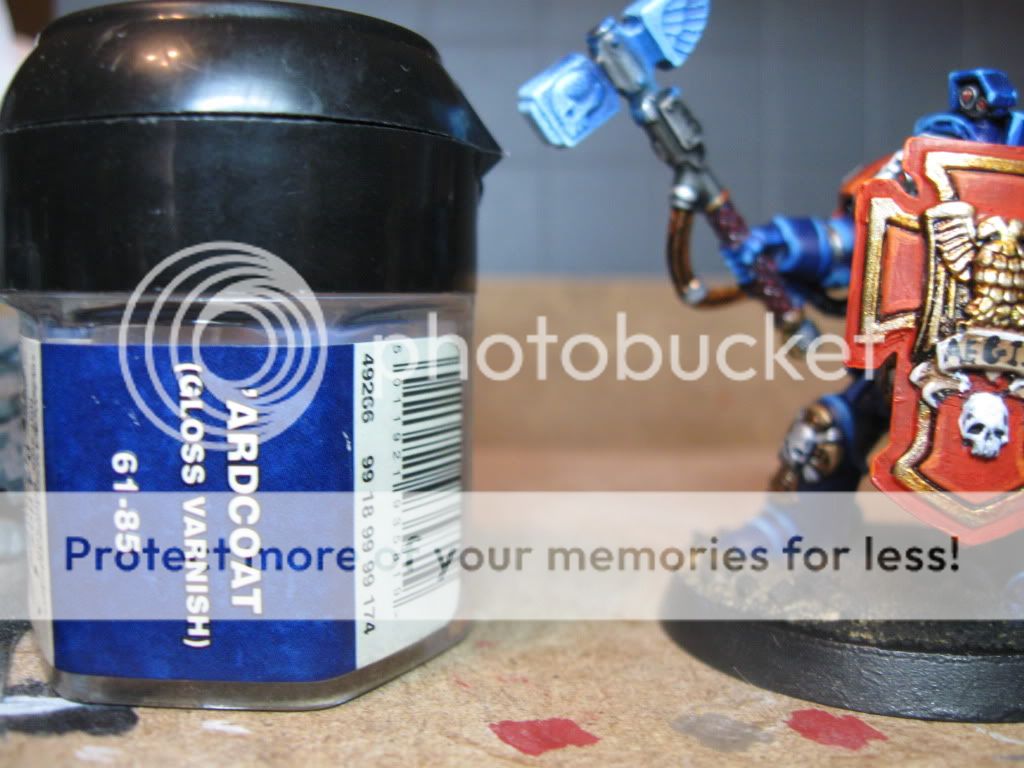
Step 30: This step is up to you whether you do it or not; I like to apply 'Ardcoat to the leather part of the hammer haft, and all the gems on the terminator to give them a bit more sparkle and make the leather look shiny. If you use a spray on Matte Varnish (I recommend Army Painter for this!), you'll want to wait until afterwards to put this on, or else your shine will disappear!


Step 31: Last, but not least, the finishing touch to the model is the Chapter Symbol on the right arm. I'll be doing a tutorial on freehand (once I'm better at it!), but for now the paint scheme is Deneb Stone for the base of the wings, followed by skull white for the striations on the wings. Chaos Black on the Dragon's Head, followed by Codex Grey for the sword blade. Go over the black slightly with Blood Red for the hilt of the sword, and then outline it in black. Finish up with blazing orange for the glowing nostrils.

Step 32: No picture for this step, mainly because I'll be doing a basing article later as well; however, for my bases I start with Scorched Brown, Drybrush heavily on Bestial Brown, Moderately Snakebite Leather, and then increasingly lighter Drybrushes of Snakebite:Skull White mix, until it reaches the colour of bleached bone. The base I then ring with Black, and stick Games Workshop Static "Glade" Grass to it sporadically.

And now you're done!


I hope everyone found this helpful, and enjoyed the read. I'll be posting a tutorial on how to do SM Helmets and bare Faces in the future, as well as basing techniques and how-to paint Powered Weapons. If there's anything here anyone would like a tutorial for in particular (Like an in-depth look at the white, or hard edging), feel free to let me know and I'll put it into the pipeline.

Comments are welcome, and encouraged!! For now, this is DragonKnight, signing off!